Add an extended My Profile screen with more input possibilities.
The User Profile extension is My Profile’s extended version with an option to customize profile fields and see your user’s inputs in the builder. In this article, we will guide you through the process of adding a User Profile screen, configuring this extension and using it.
Add User Profile screen
Go to Screens → press the + button → search for User Profile in the pop-up window (it can be found under the Users tab as well) → click on the extension’s card to add it as one of the screens of your app.

User Profile is a pre-installed extension so you will not have to install it from the Extension Marketplace beforehand. This is also a system extension so it cannot be deleted.
Configure User Profile
User Profile can be configured in Settings → User Profile → Profile. In this section, you will be able to choose which pieces of information you’d like to collect from your users so that once they register to your app, they can edit their profile and add information about themselves.
By default, there are already several strings added as an example:
- “name” – name and surname of the user
- “image” – the profile photo of the user
- “nick” – username of the user which cannot be edited and shouldn’t be removed!
- “location” – single-line input for the user’s location (user cannot choose cities/countries from a dropdown, only manually add the location)
- “description” – multi-line input for the user’s bio
- “url” – the link to your website

These strings can be customized – you can adjust the existing ones, change their display priority, create new ones, or make some of them mandatory. To do so, we suggest using a tool such as JSONLint where you can upload your JSON, edit it and check its validity.
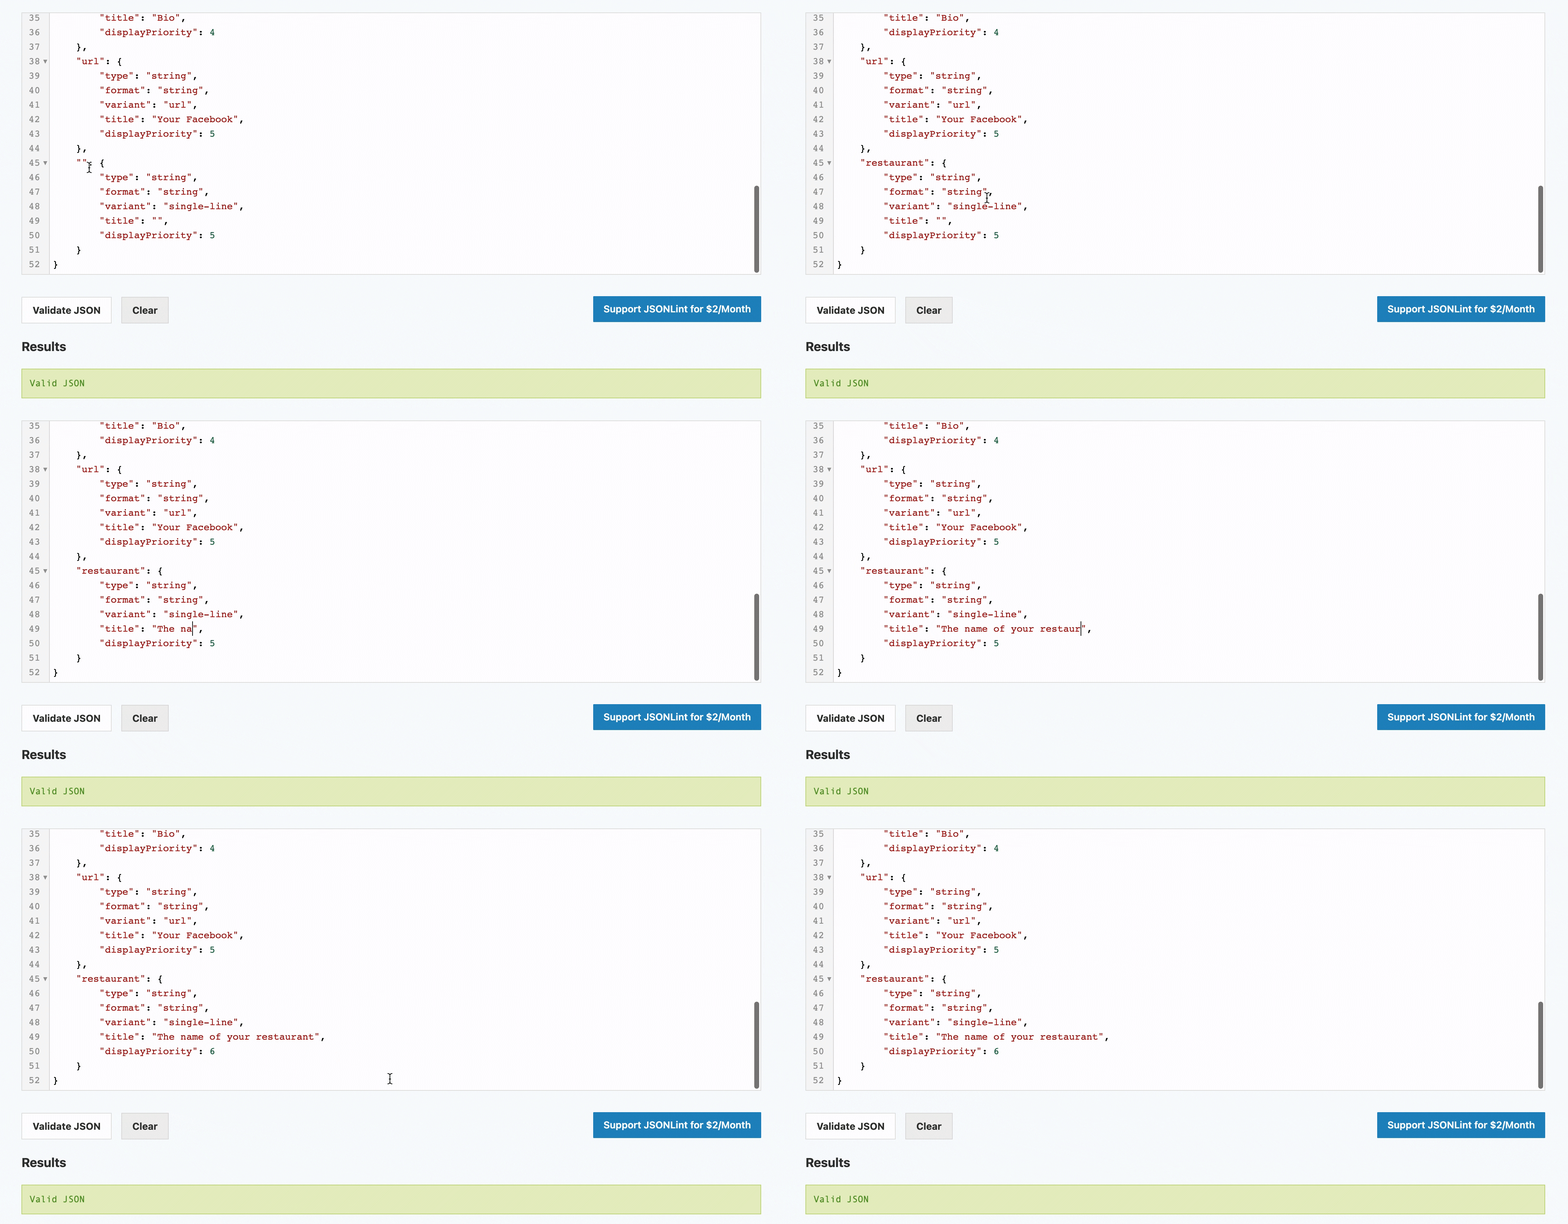
Let’s say that we want to rename the “url” string, specifically update its display name (title). Here is how we’ll do it:

We didn’t change the name of the string but simply updated the title inside of the brackets. Instead of “Website” users will now see “Your Facebook” instead.
To create a new string, we can simply copy-paste the format of the existing screen in a tool like JSONLint and fill in the text inside of the brackets. Here’s an example of adding a string called “restaurant” so that we can ask the user to share the name of their restaurant in their profile description:

When you are creating new strings, beware of the following:
- String names cannot contain blank spaces, numbers, or special characters. For example, string names “restaurant$”, “restaurant name” or “10 restaurants!” will not be accepted.
- The string type and format you can use are string and image only.
- You can use variants such as single-line, multi-line, circle (for image only), and URL.
To restrict the number of characters allowed for each input, add the following string: “maxLength”. You can also add a placeholder for the input field (“placeholder”) and make this input mandatory. Example:

As the last step, the edited/created strings need to be uploaded to the builder. Make sure to first validate your strings!

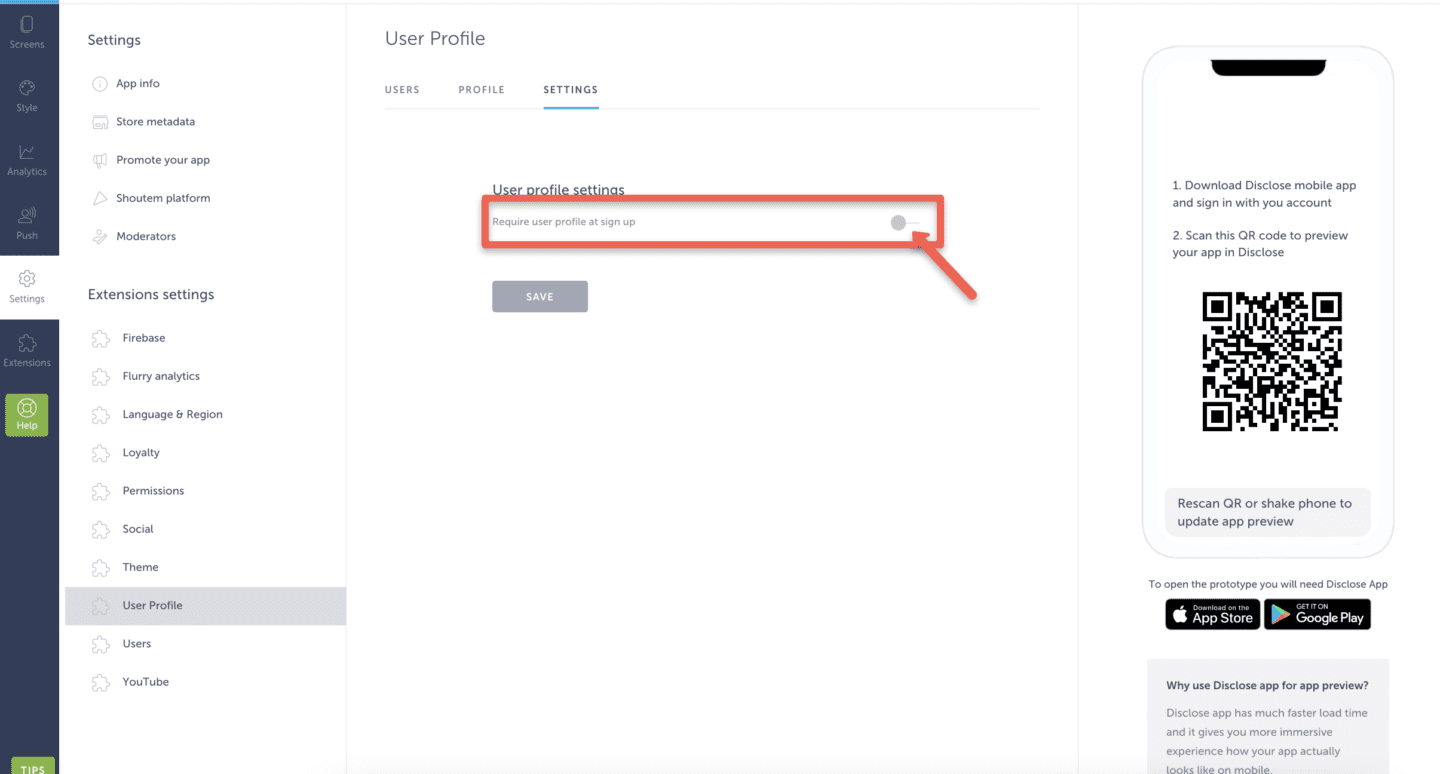
Moving forward, in Settings → User Profile → Settings, you can decide whether or not you will ask the users to complete their profile before they sign up. That means that once the user has completed the registration process, the user profile will open up before they can access the app’s content and they will need to first fill in their profile details.

If this is not enabled, it will not be mandatory that the user fills in their profile before completing the registration. The form will not open up once the registration is completed, but the user will be able to access and edit it from My Profile screen.
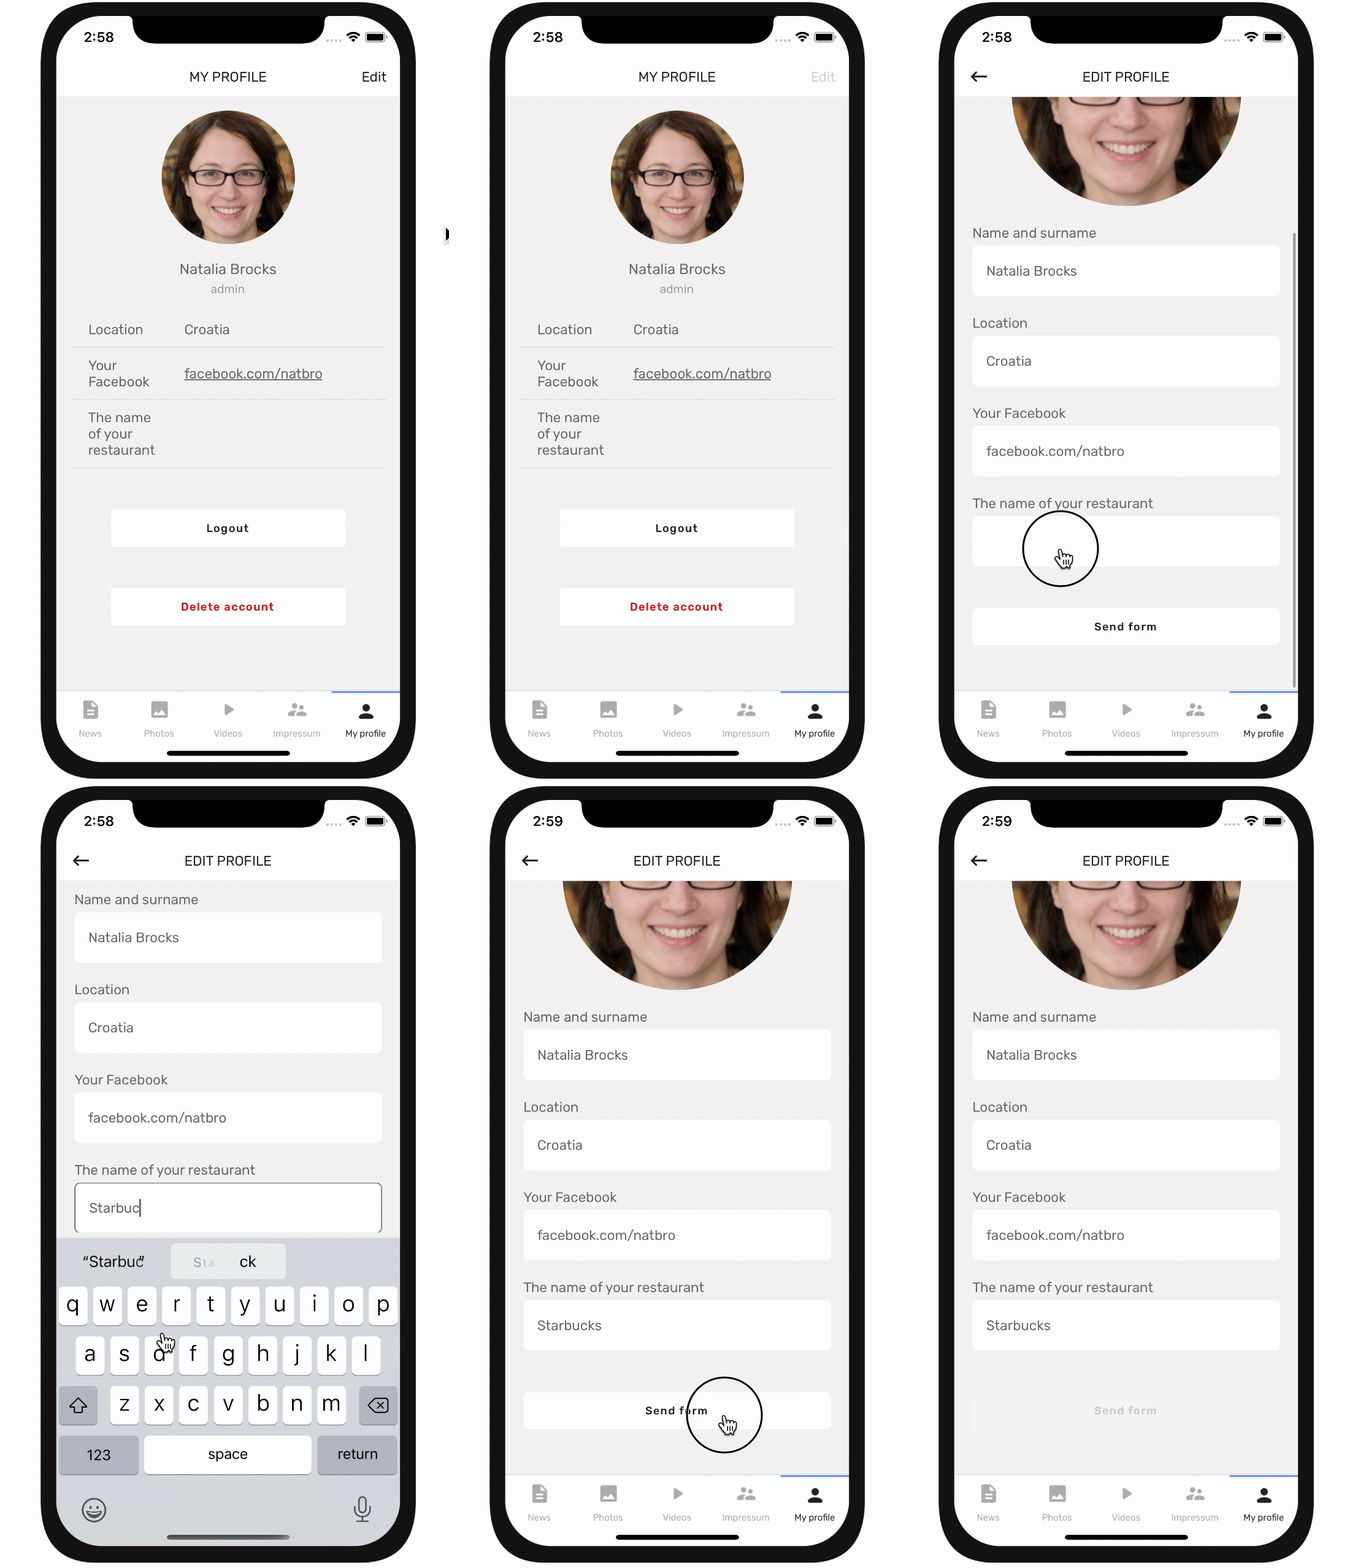
How it looks in the app


As you can see, users can delete or edit their accounts from here, as well as log out.
Find registered users’ profiles in the builder
All registered users and their profiles can be found in Settings → User Profile → Users.

You can open up their profiles and check the details.
