This setup is useful if you want to use the loyalty program for a single store.
The main difference between the single card loyalty program and the multi-card loyalty program is that in the single card loyalty rewards are not tied to any store in the app.
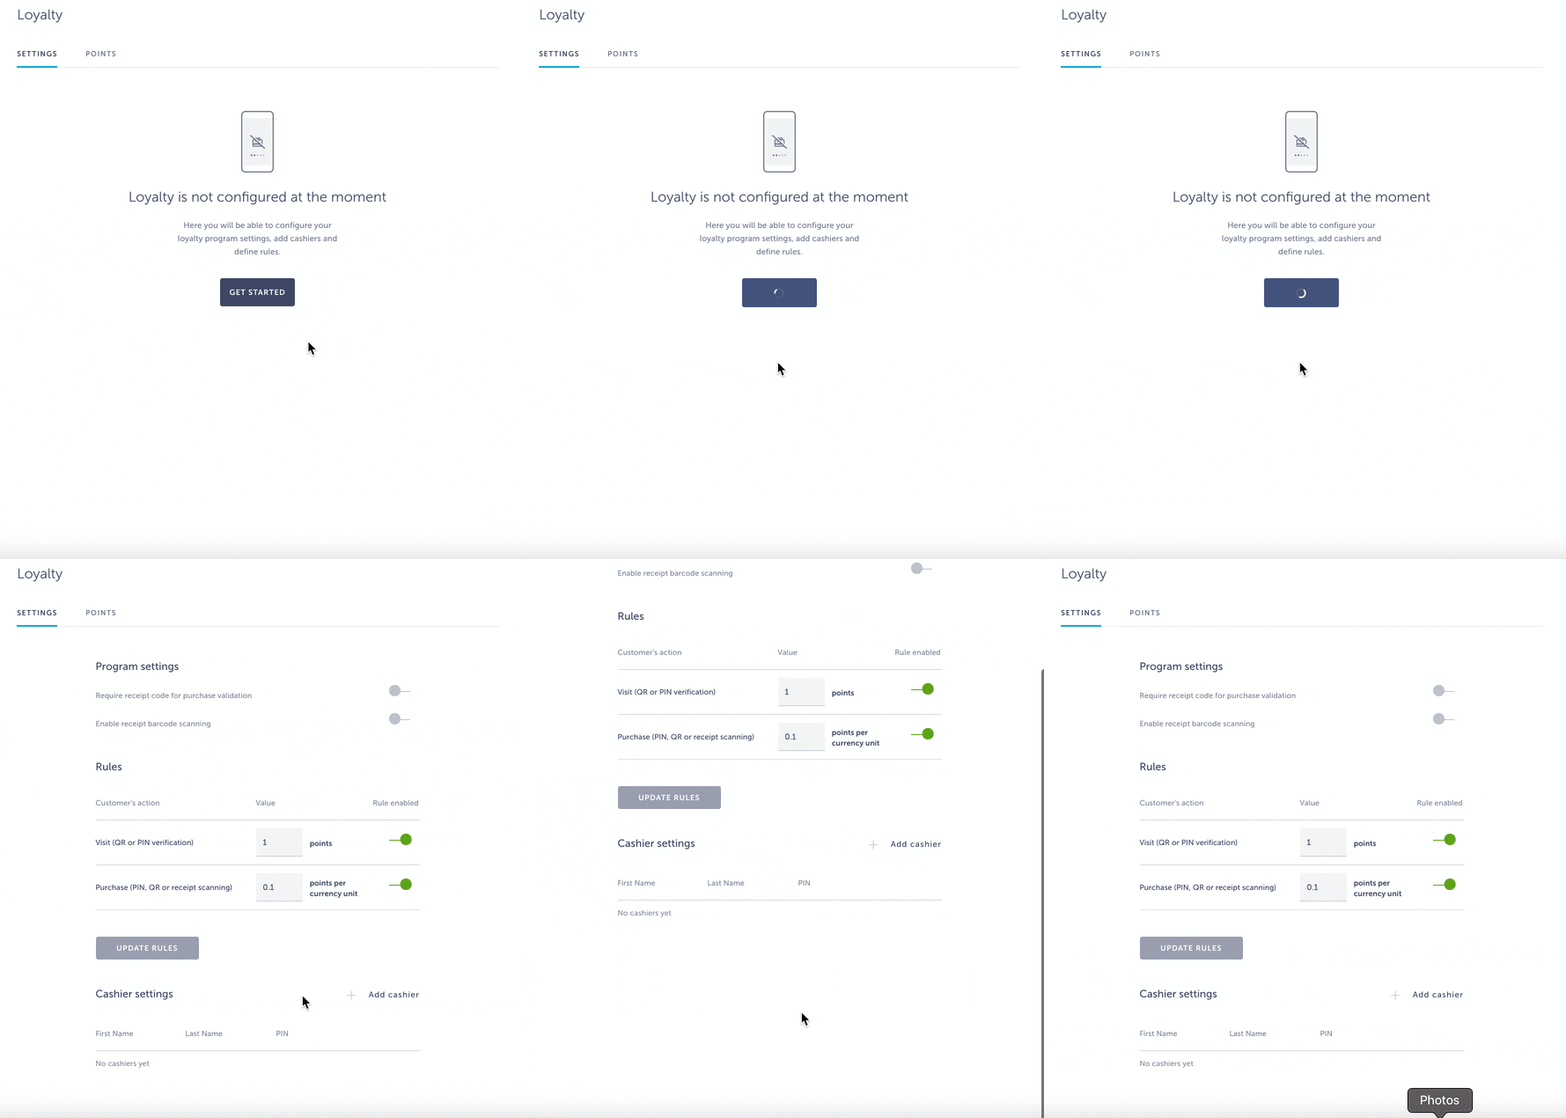
First things first – configure Loyalty extension in Settings so that you can use Single card loyalty program. Go to Settings → (Extensions settings) → Loyalty and press Get started.
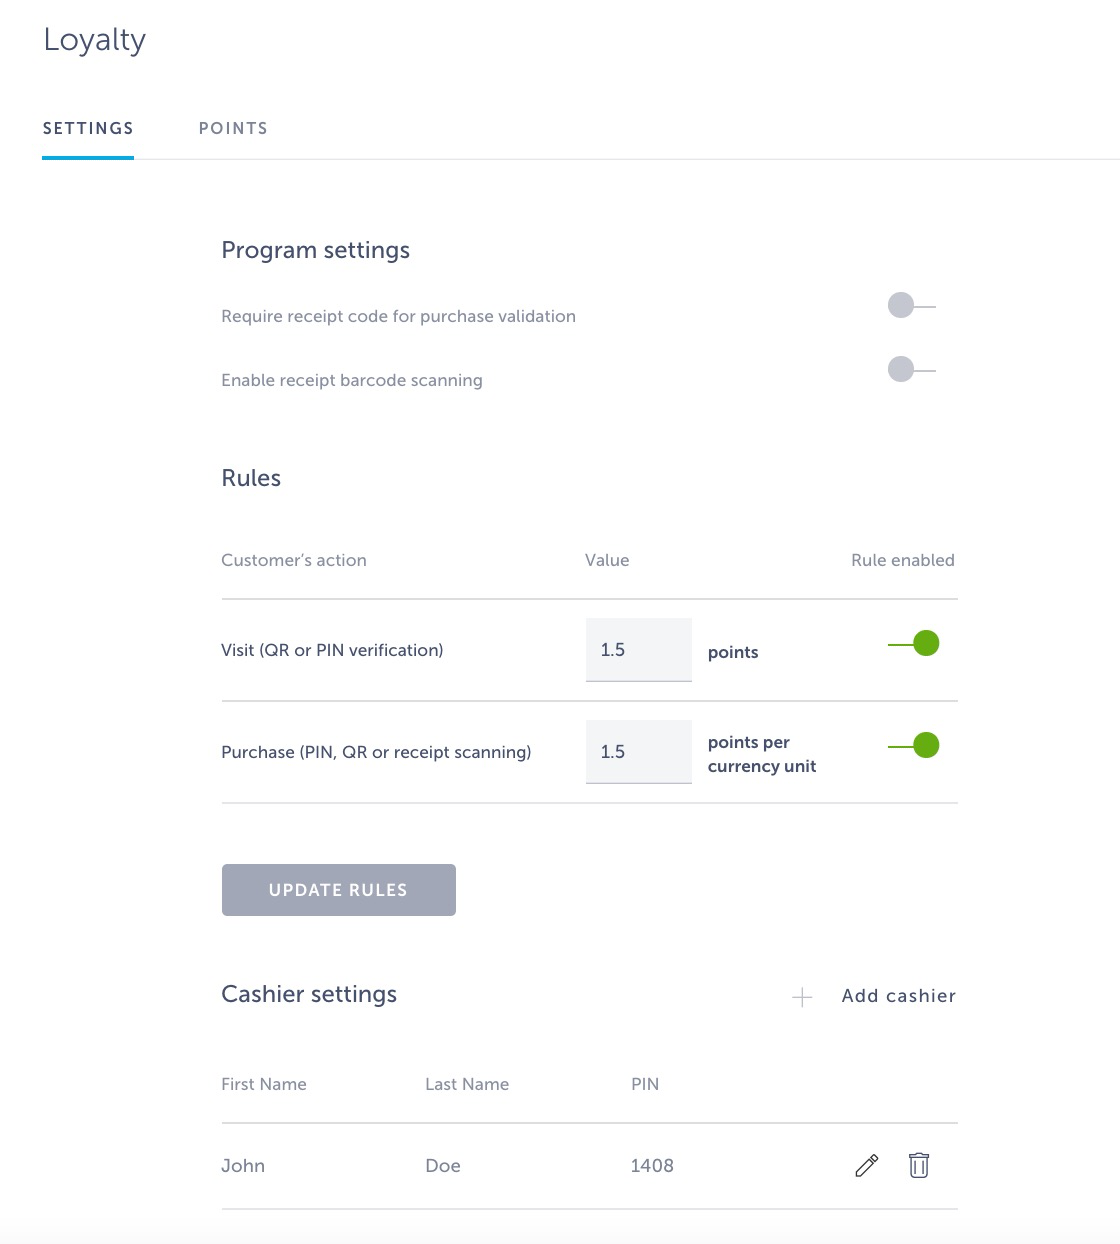
In Program settings choose Require receipt code for purchase validation or Enable receipt barcode scanning.
In Rules section select how many points your customers will receive for certain actions. Points can be configured for Visit and for Purchase. If Purchase is enabled, you can choose how many points customers will get per currency unit (e.g. 1 point per 1 USD).
In the app, each of those actions will be verifiable by cashier with either QR code scan or PIN verification through My Card screen.
In Cashier settings add a cashier’s first name, last name, email and password he will use to log into the app, and PIN they will use for the verifications of transactions.
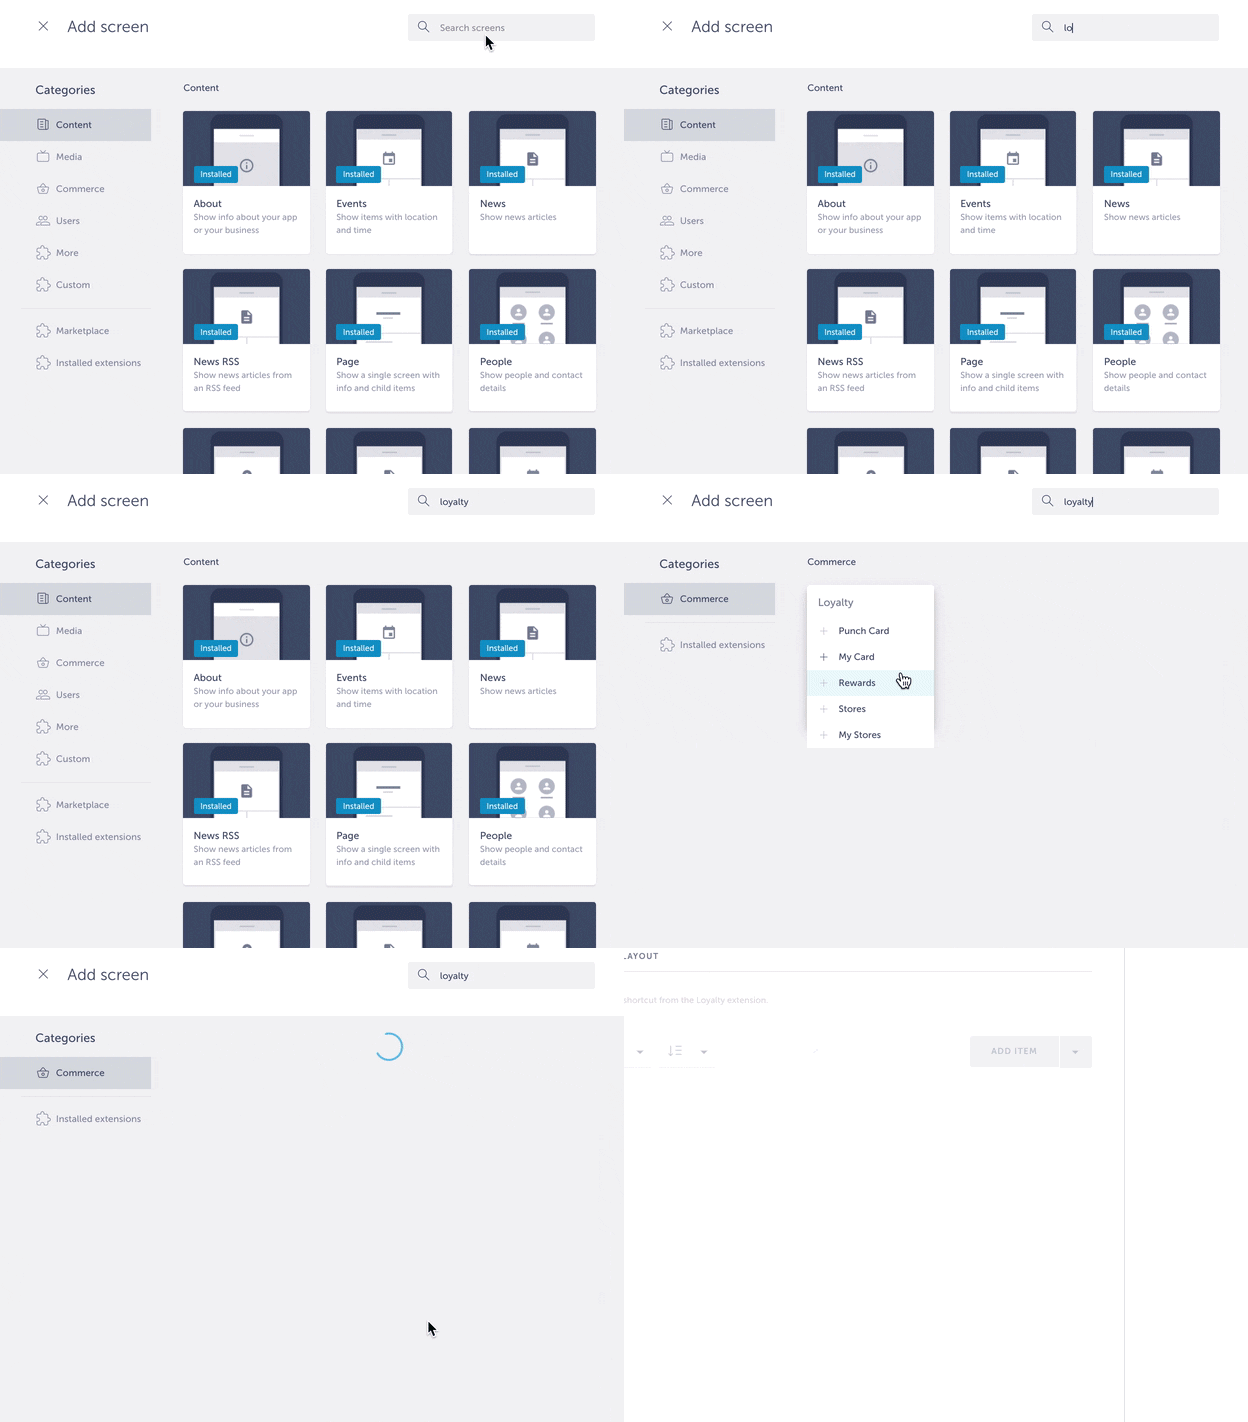
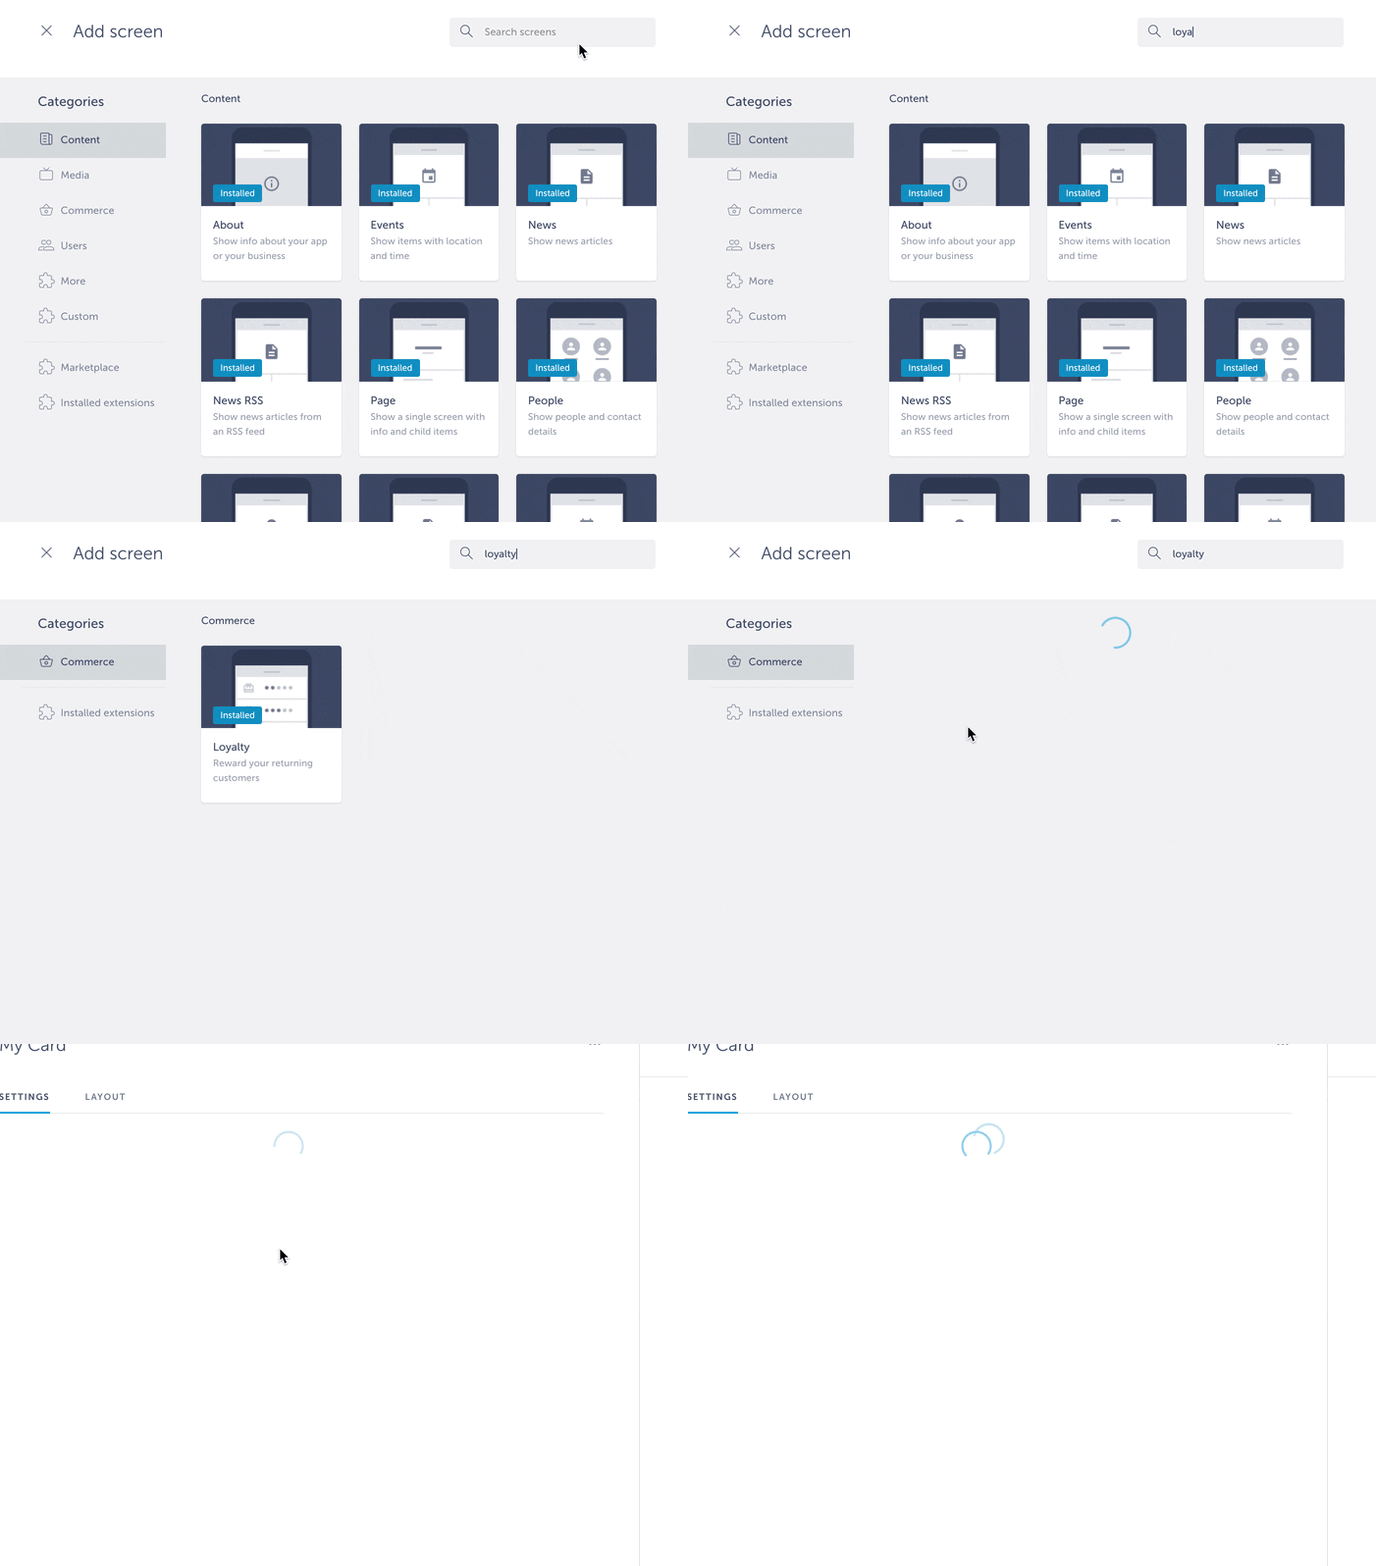
After you have configured Loyalty, it is time to add Rewards as one of the screens to your app. Go to Screens → press the + button → search Loyalty in the pop-up window → hover with your mouse over this extension and choose Rewards.
Click ADD ITEM to add rewards to the screen. Each reward can contain the following pieces of information:
- Title
- Image
- Description
- Time of validity
- End of validity
- Timezone
- Points required
- Number of rewards
You can select the way to validate the reward, eg. by setting the time frame during which the reward will be available. You can also choose how many points the customer needs to be able to redeem the reward and the quantity of the offered rewards. At the bottom of the item, you can choose the store to which this item belongs to.
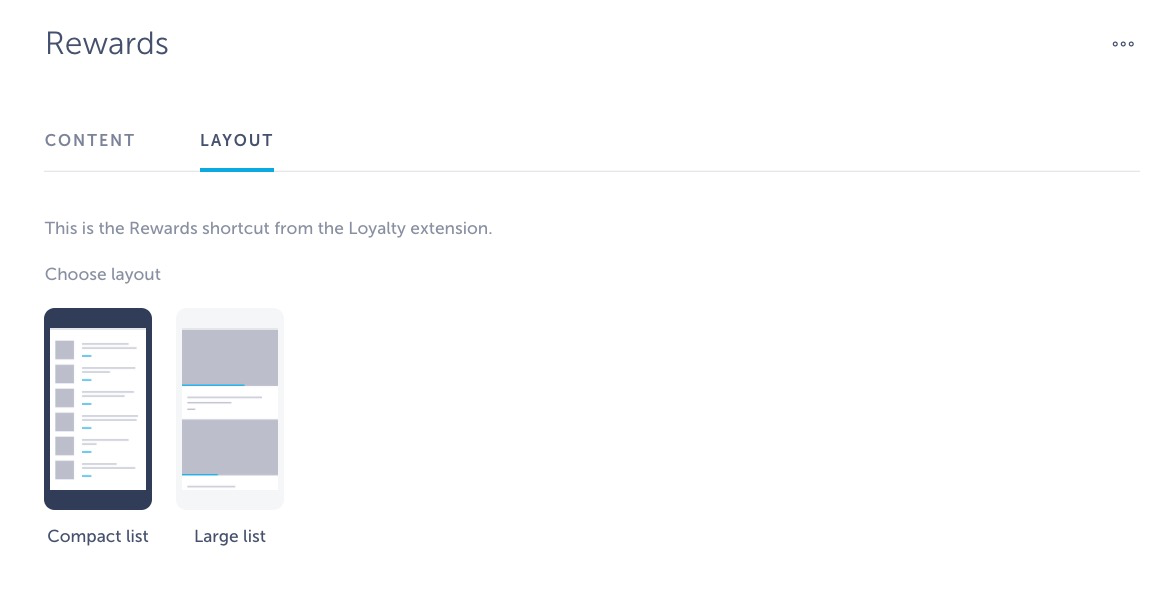
Choose the layout in Layout section:
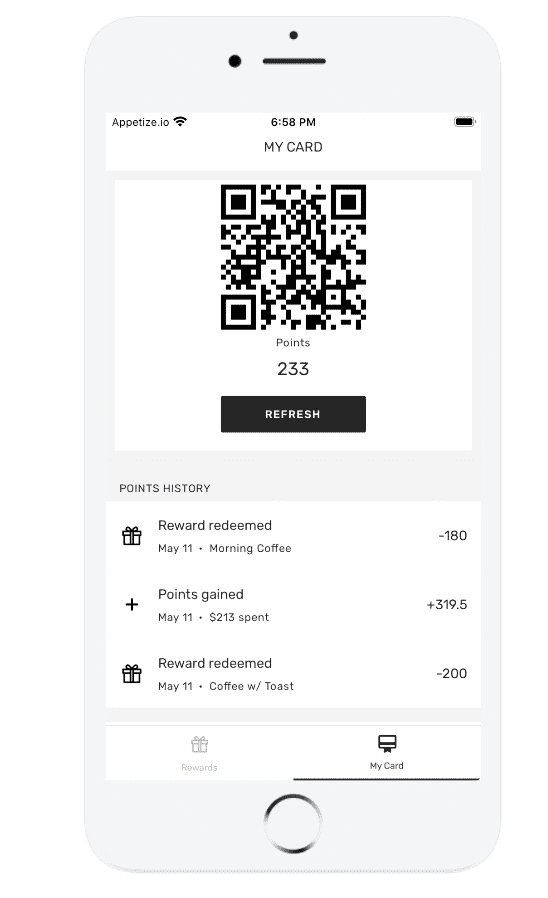
Add My Card screen to the app, where customers can check the rewards they’ve redeemed, check how many points they have, and through which they can collect points as part of single card loyalty. Cashiers use this screen so they can scan QR codes.
Single card loyalty program in the app
From the customer’s perspective: imagine that you’ve just made a purchase and you would like to collect the points for it. Log in to the app and navigate to the My Card screen. Show the screen to the cashier who can scan the QR code from it or verify your purchase by inserting his PIN code. The cashier will then enter purchase details, such as receipt sum and/or code, and press Confirm to assign points to you.
If you have enough points to redeem a reward, navigate to screen with rewards and choose the reward you’d like to redeem. Show the screen to the cashier who will validate the redemption by scanning the QR code or inserting PIN code. Once you press Continue, the reward will be redeemed.
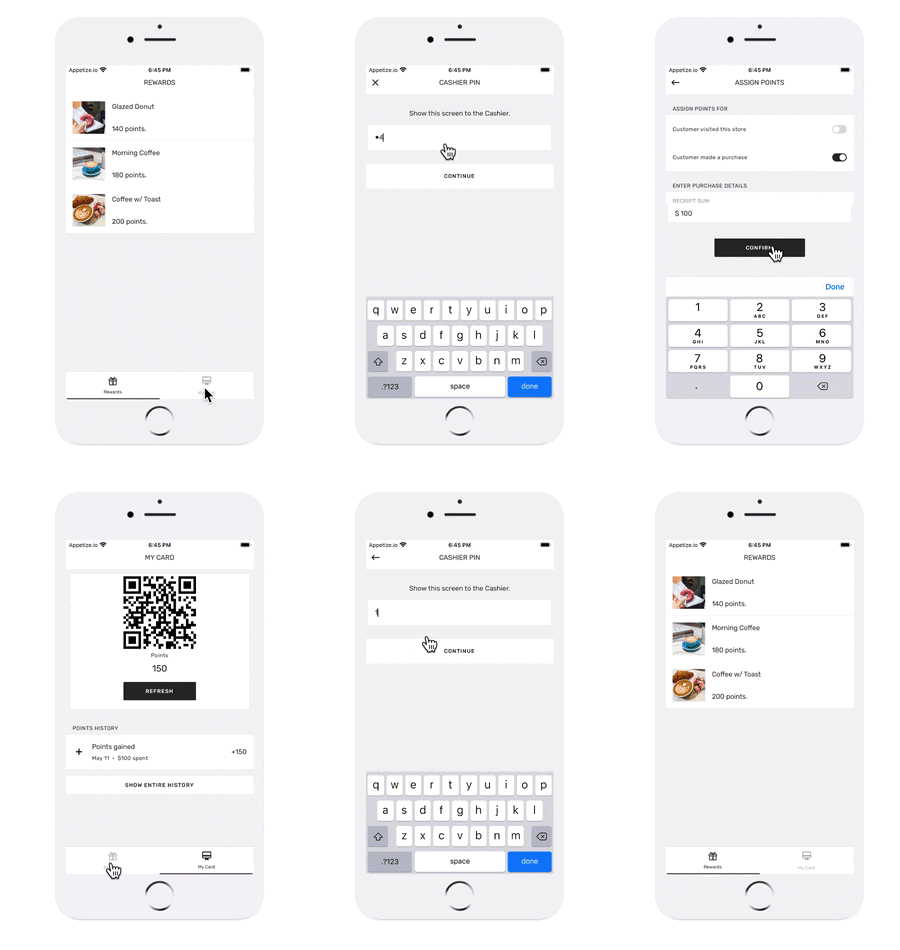
From the cashier’s perspective: the customer has made a purchase and would like to collect points for it. Ask them to open their app and navigate to the My Card screen. Open your app and log in to it with the credentials you were given for your cashier profile. You should open My Card screen as well to scan the QR code from the customer’s phone or insert the PIN code you were given to assign points and confirm redemptions.
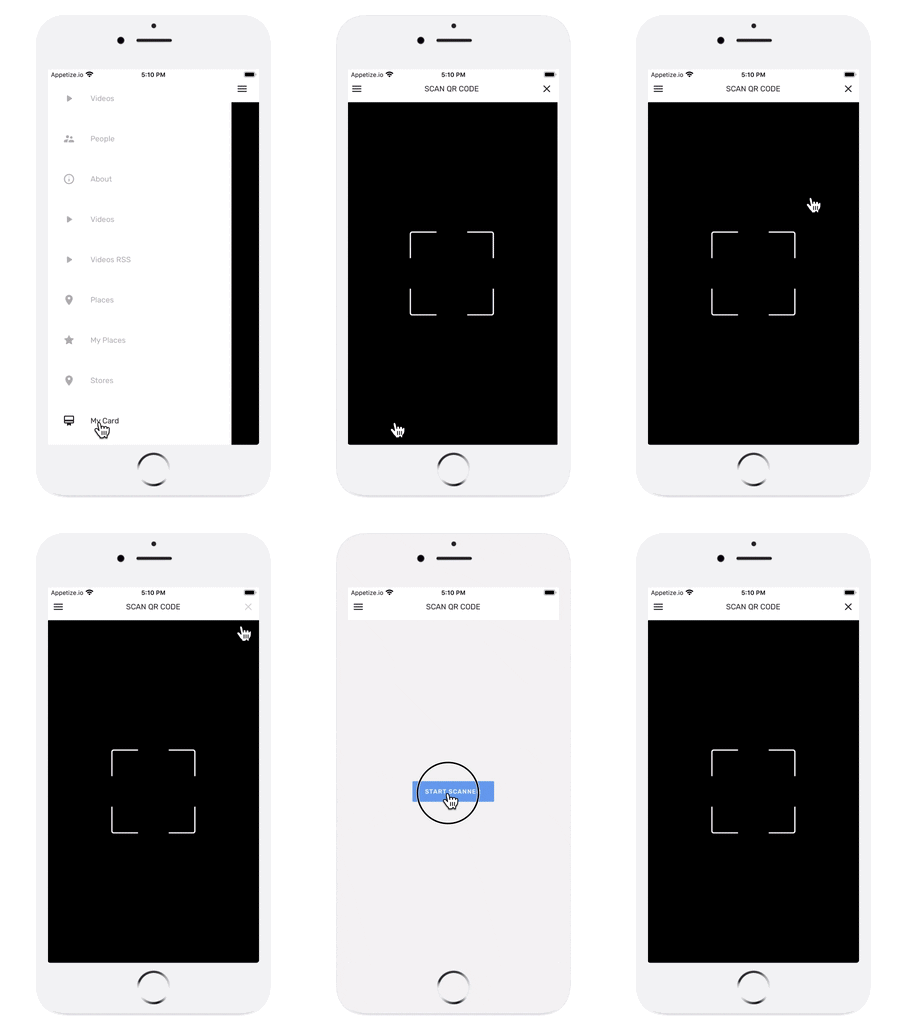
Cashiers see QR code scanner when they open My Card screen:
This is what the app users will see once they open My Card screen:
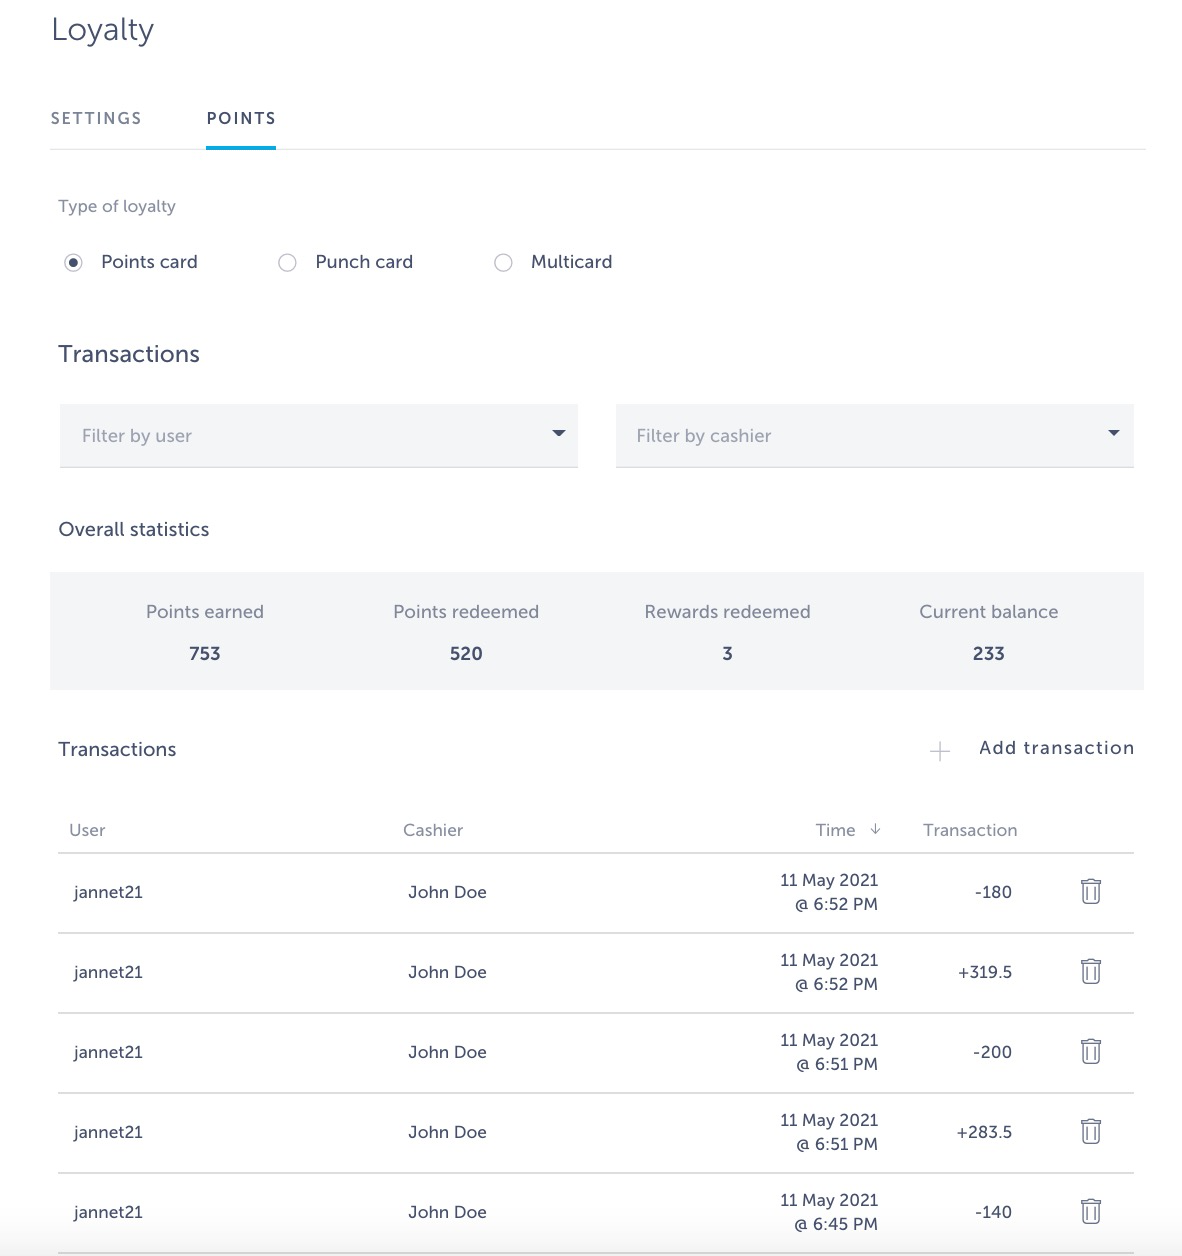
Where can I check single card loyalty transactions and add some manually in the builder?
Go to Settings → (Extensions settings) → Loyalty → Points. Mark Points card under Type of loyalty to get the overview of single card transactions. You can filter your results by user or cashier.
Can I import the list of rewards?
Of course! Click here to learn how to do it.
Related articles:
Want us to create an app with single card loyalty programme for you? Schedule a call here and get your app published in just 10 days!
